Yes it is...We musicians are really absent-minded sometimes and messy in the others. Although I refuse to make any drums or percussion recordings without turning the metronome (or the audio click) on, when we start to share projects between different studios/producers, there often appears "free" recordings without any tight tempo feel.
Actually many experienced (and traditional) producers would say: "metronome kills the human feel in music", and they could refuse to quantize any recordings after the session.
Probably a jazz drum player would refuse to play with the metronome on anyway.
What we are going to do now, will be adjusting the tempo/metronome of the project, to our
brilliant drum player this time. We can leave punishing him/her to a different post.
Ok, we have a drum/percussion track in our hands which seems to be untight, and gets out of sync as it improves or the musician makes really
groovy stuff throughout the recording... maybe the drum player is in sync with something we don't know, or he/she is being
creative.
How to work with a metronome-free untight drum/percussion recording?(The techique will be explained on a stereo drum track, but same rules can be applied to multitrack recordings in which the bass drum, snares etc. are recorded to seperate tracks)I've found a real "free" recording for the tutorial: It is
Bohemian Rhapsody by
Queen.
Some time signature changes, and obviously, metronome or a click track was not used during the recording.
"... carry on, carry on, nothing really matters..."Let's see what Roger Taylor has done...
(hehe)First things first... make sure you
know the
time signature of the recording. Count how many hits 'n beats in 1 measure. When we used to work with tape recorders, it wasn't possible to see the wave forms, now it should be even easier to do it.
The part I will examine is
from where the band gets really "excited" (4:07).With a weird-enough signature of 12/8 and a recording without a metronome, I think we have a good material at hand for the tweaking. Let's prove we can lock the project tempo to the recording...
Tempo mapping in Cubase/Nuendo1- Set the time signature properly either by using the
Tempo Track
(Ctrl+T on PC, Command+T on Mac) or the
Transport Bar (Function Key: F2)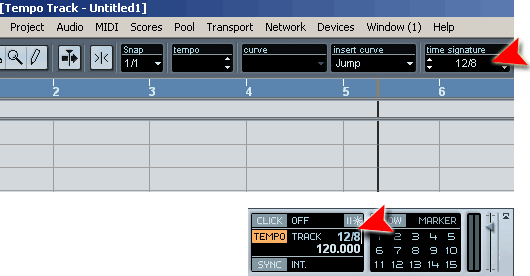
2- Zoom in the main arrangement window, turn the
Snap off (if on), and move the 1st downbeat to the grid (start position) you want
(In the figure, that is the beginning of the 3rd measure).
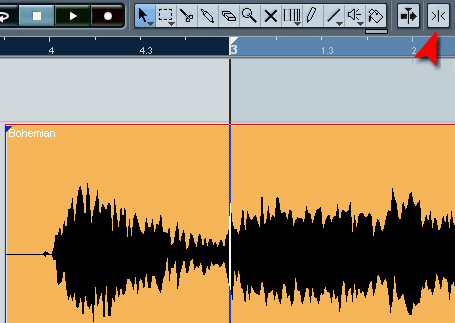 Important!This part of the recording starts with a short fill-in as you can see above, so I did not set the first transient as the first downbeat.
3- Open the recording in the
Sample Editor, deselect Hitpoint mode (if selected) and choose the Time Warp tool.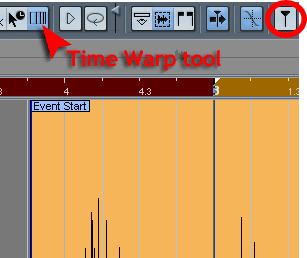
go to the 3rd measure (like above)
4- Press "Shift" key on your computer keyboard, the cursor will turn into a pencil (whoa) and click in the event at the position of the first downbeat. You've just added a "tempo event" at the first downbeat - it will lock it to that place, so we won't be able to move it accidentally.
5- Now, locate the start of the next bar in the
ruler.
Put the cursor somewhere close to the grid line (at the beginning of the 4th measure below), so that you'll see a small metronome symbol on the screen.
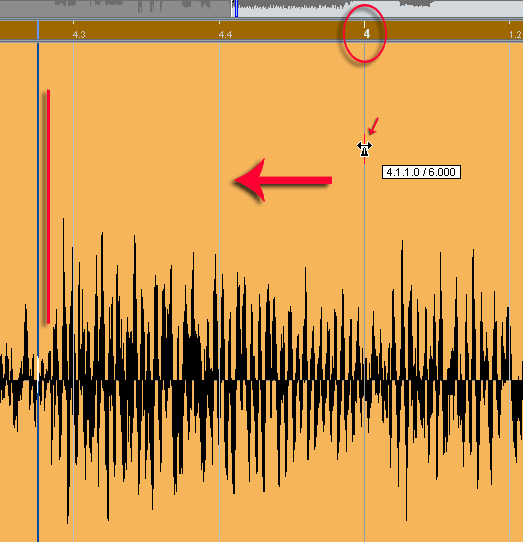
Click at that position and drag the position to the downbeat of the second bar of the recording. Don't forget, we are moving the grids, not the audio!
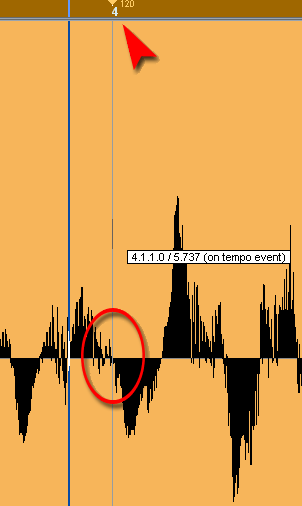 Now... don't exaggerate!
When you click, the pointer will snap to the ruler grid. Now the tempo value is changed with the moved grid.
First measure seems to be pretty tight now, as you can see below, 16th note grids and transients in the wave form of the recording are nicely aligned together.
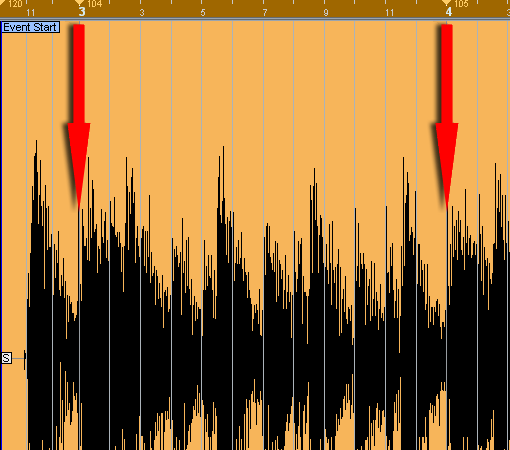
But what about the rest?
Well, Roger Taylor was playing live, together with the rest of the band ("omg" goes here) and probably he wouldn't care less about the metronome. If I were him, I wouldn't care at all.
Let's repeat the process once or twice more, and hope we'll get a more stable tempo throughout...
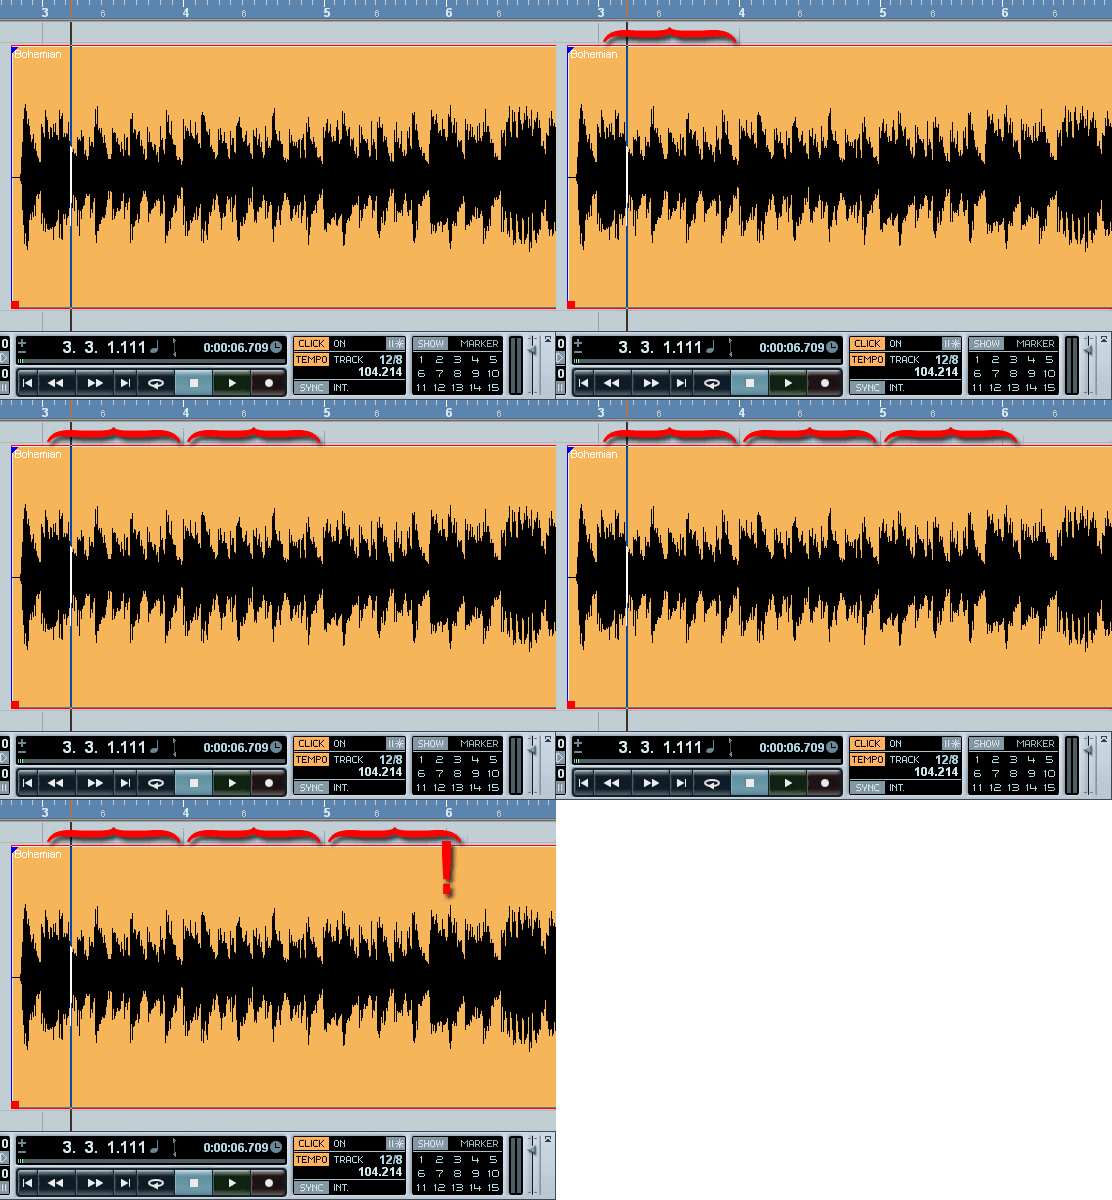 Ooops!
1st and 2nd measure seems to be fine, but not the 3rd.
Well, he can't change the tempo that often, can he?
Let's go to tempo track and see what's been going on there...
6- Click ctrl+T
As you can see below, the original tempo/metronome data that we have started with comes in act, and changes the sweet tempo we've figured abruptly. It is still there at 120 bpm (default tempo of Cubase/Nuendo project templates).
Meet the "nodes":
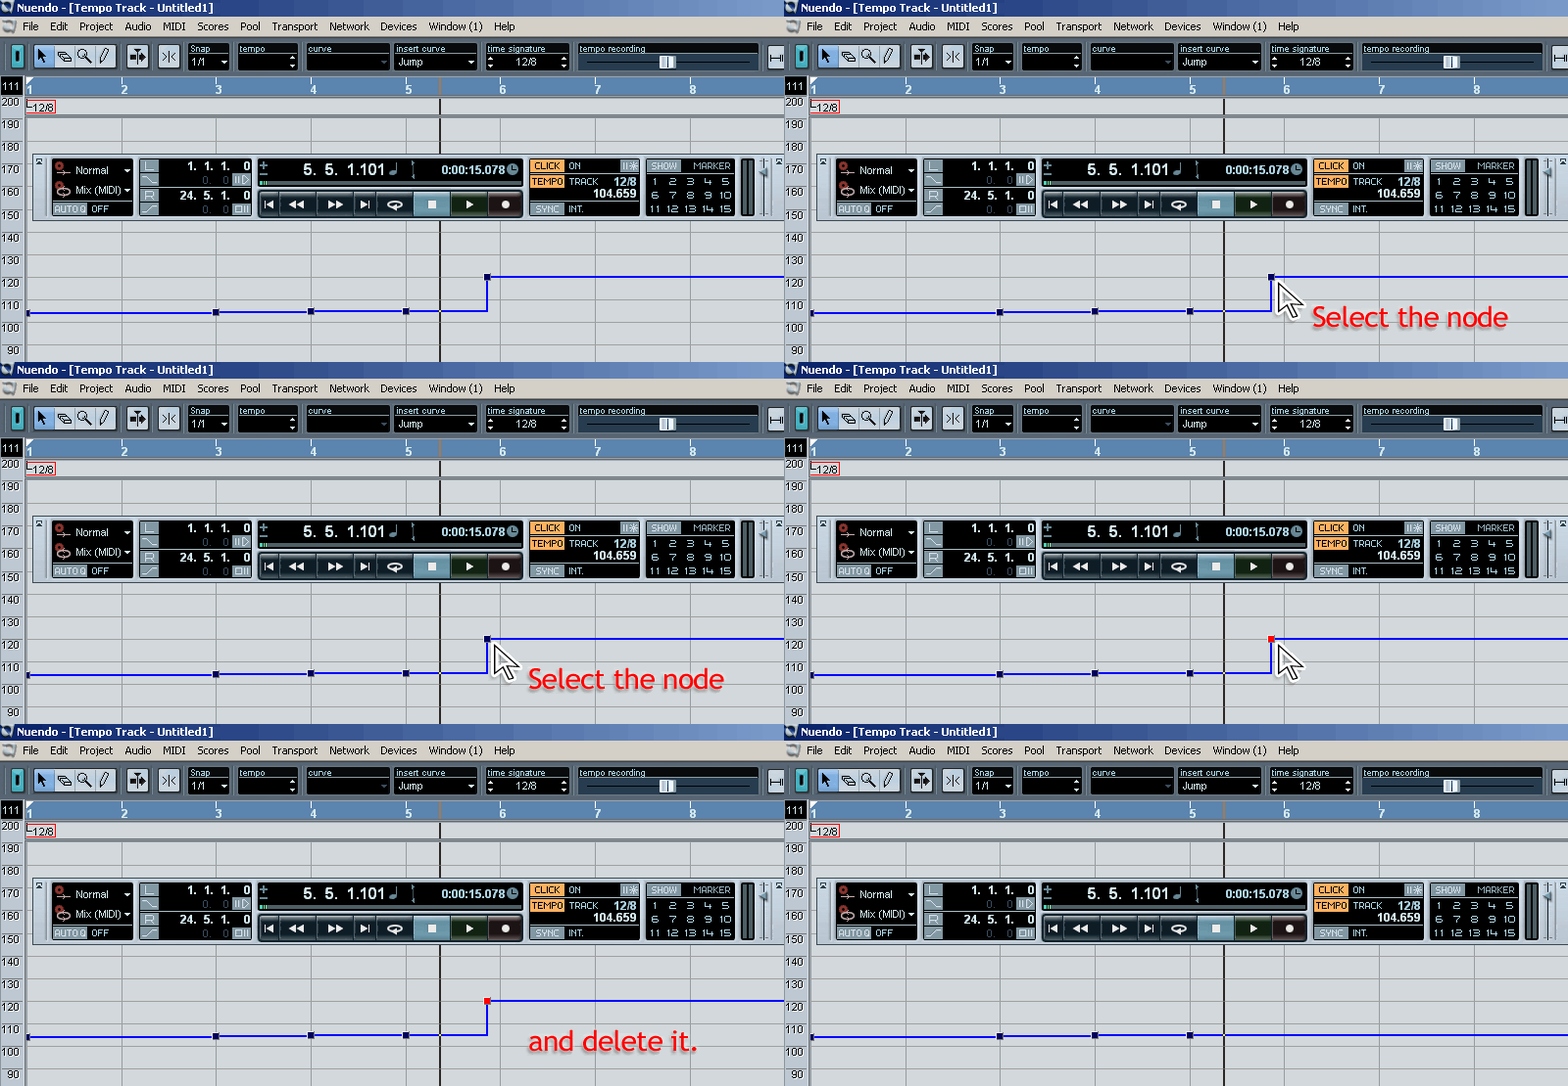
What we're going to do is, selecting the node which disturbs the
steady rhythm and delete it from the tempo track, so the last node before can do its job.
Now it should more or less be fine, but as long as drum player changes the tempo, you'll have to make subtle changes as described in the steps 1-5.
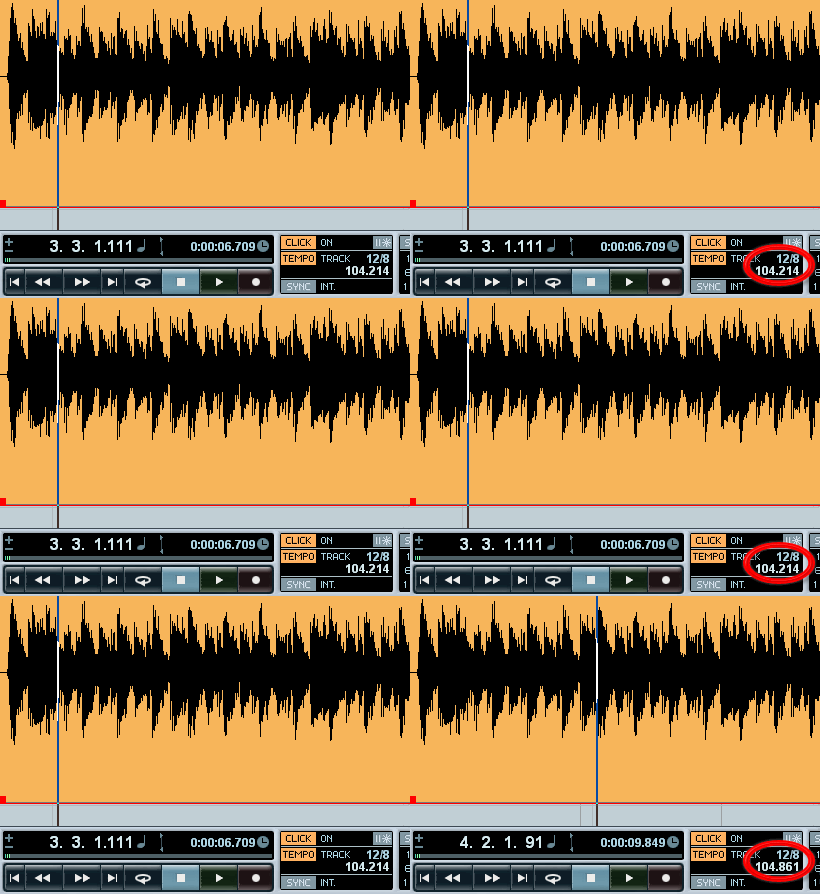
As you can see it from the transport bar above, the machine follows the drummer, so that you can relax and have your MIDIs or other recordings built on the drum track!
Have any questions? Any other functions that you want to grasp?
Have your say via comments then!
View the original article here



Join The Community